Bakery
Step 9: The Art of Shaping Dough: Mastering Bread’s Final Form
The journey of bread-making is filled with various crucial stages, each contributing to the final masterpiece. One of those significant stages is shaping the dough, a step that decides the aesthetic quality of your bread and subtly influences texture. In this blog post, we’ll dive into the nuances of dough shaping, as discussed in Episode 9 of the ‘Steps of Baking’ podcast series. Whether you’re a novice or an experienced baker, these insights will guide you in mastering this essential skill.
The Role of Shaping in Bread Making
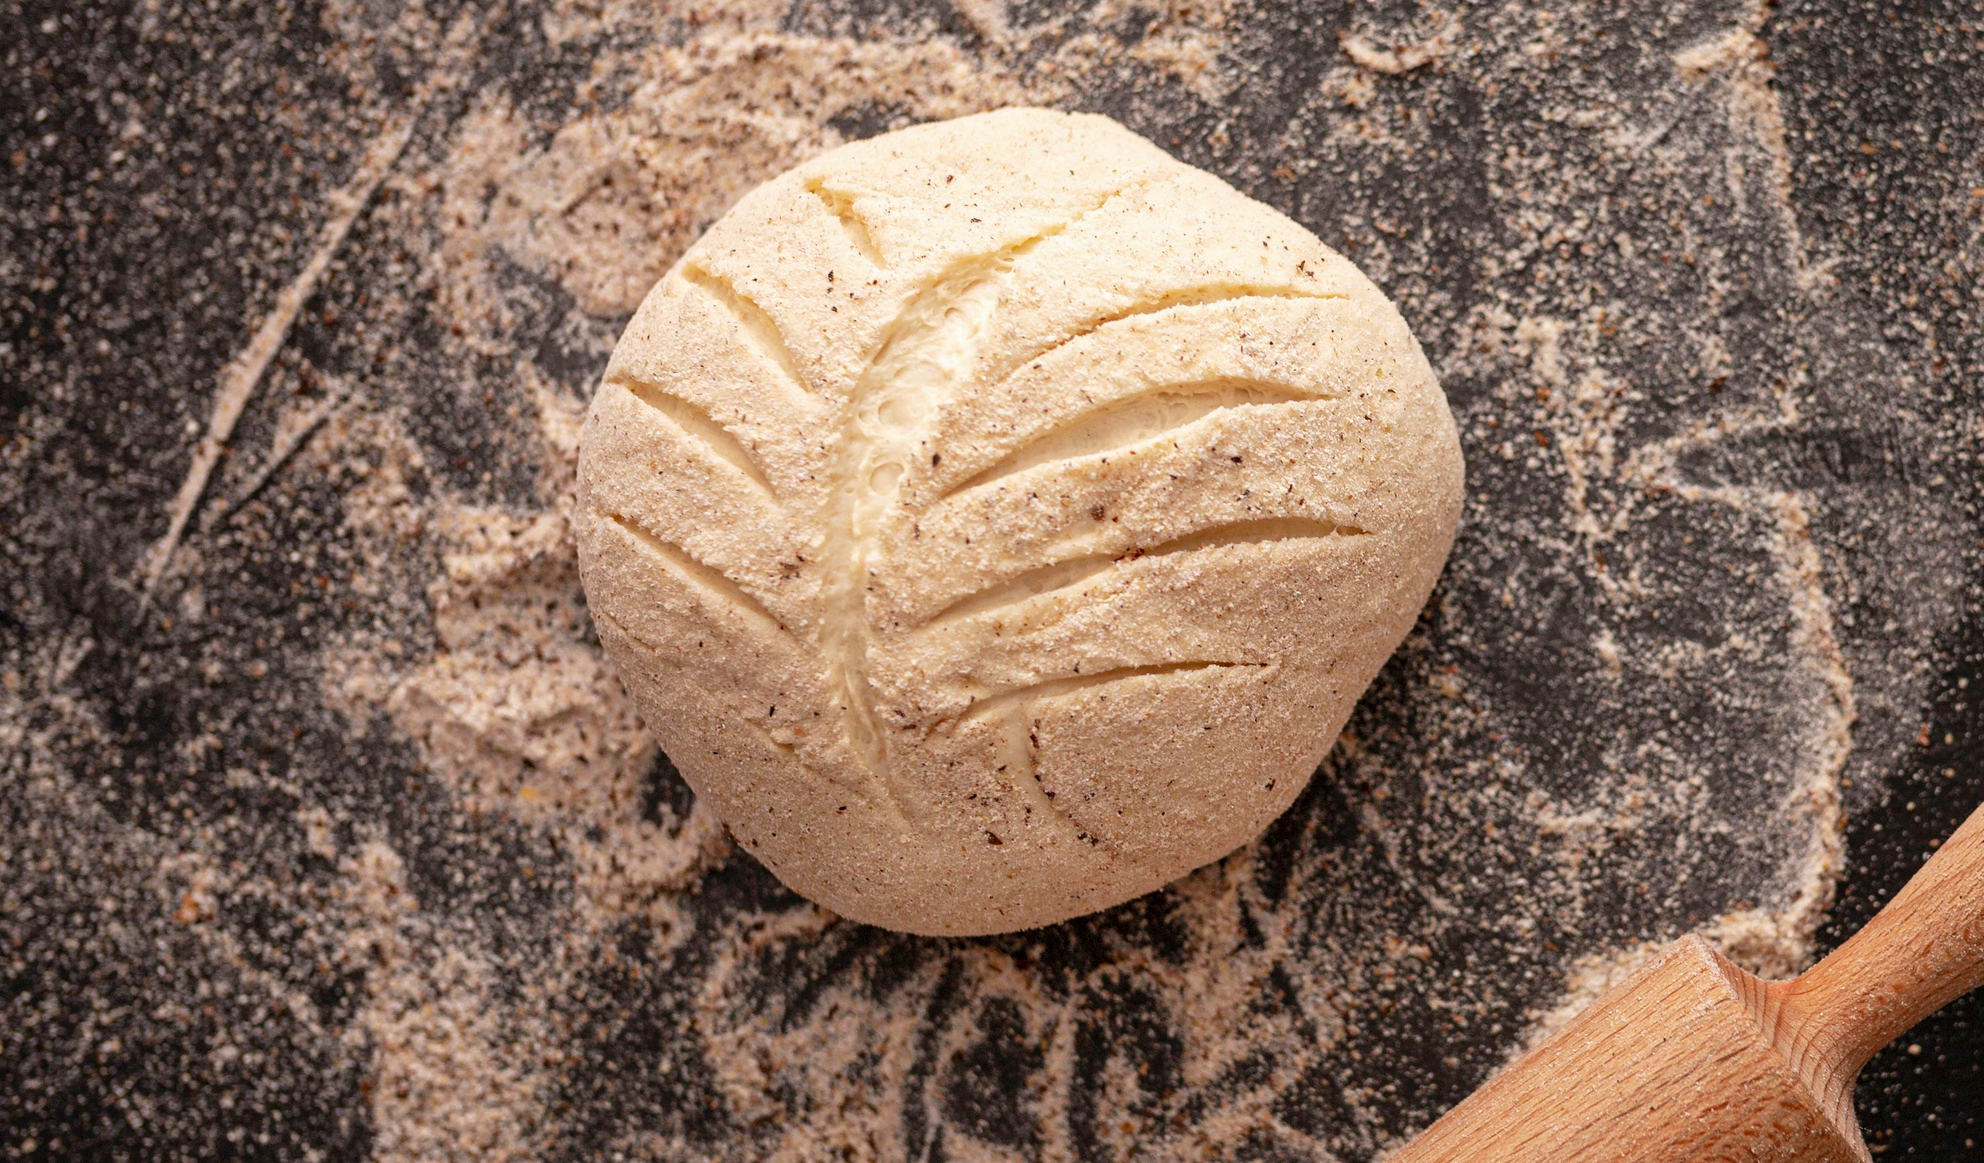
Shaping is not merely an act of rolling dough into a preferred form; it’s an intricate dance that balances tension and elasticity. This stage follows after pre-shaping and bench resting. Here, the dough transforms based on your intended bread type, whether that’s a rustic baguette, a soft brioche bun, or a traditional Georgian khachapuri. The technique used in shaping influences how the bread will expand in the oven, the crust’s texture, and even the moisture retention in the crumb.
East Africa Chef highlights that each bread type has its unique shaping method. Mastery over this phase requires an understanding of the specific dough characteristics and desired end result. Even in a home setting, where aesthetics might play a secondary role to taste, a well-shaped loaf enhances the dining experience.
The Interconnection of Baking Steps
Dough shaping does not exist in isolation. Its success is predicated on earlier steps like fermentation and pre-shaping. Fermentation affects the dough’s elasticity and flavor profile, while pre-shaping sets the foundation for the final form. ProBaker notes that a dough that hasn’t rested sufficiently can be challenging to shape, potentially leading to tearing and imperfections.
Home bakers must account for these preceding steps, ensuring dough is adequately fermented and rested. This attention to detail enhances the ease of shaping and contributes to a well-structured loaf that looks as good as it tastes.
Fundamental Techniques for Beginners
For beginners, entering the world of bread shaping can seem daunting. ProBaker suggests starting simple, tackling straightforward shapes that build confidence and hone your skills. Pretzels, with their iconic loops and twists, provide an excellent starting point. Follow the basics: create tension by gently rolling the dough against the counter, shaping it into a log, and forming classic shapes.
Pita bread serves as another example of simplicity yet perfection. Rolling the dough into small, uniform discs ensures it puffs correctly in the oven, creating that beloved pocket.
Once these techniques are comfortable, bakers should gradually explore more complex forms like khachapuri. It offers a delightful challenge with its boat-like shape and cheesy filling.
Advanced Shaping: High-Hydration Sourdough and Beyond
As bakers gain confidence, they may experiment with more challenging concepts like high-hydration sourdough. These doughs require a tight shaping technique to support the airy crumb structure and avoid deflation during baking. Using adequate flour when handling the dough is crucial. While too little can cause sticking, too much will make the dough slide, hampering the shaping process.
High-hydration doughs also necessitate stitching—a method of folding the dough to build tension. This ensures when the dough bakes, it expands upwards, creating a loaf with a pleasing rise and a chewy crust.
Common Shaping Challenges and Solutions
Every baker, novice or experienced, encounters challenges in shaping. Tearing dough, achieving uneven shapes, or having a final product that doesn’t meet expectations can be discouraging.
One frequent issue is using too much or too little flour. ProBaker emphasizes finding a balance—enough to prevent sticking but not so much that it slides. Another challenge is the dough’s elasticity; too tight shaping can inhibit the dough’s ability to expand in the oven. Adjusting your technique based on the dough’s dryness or wetness can prevent such issues.
Practice is equally important. Shaping bread flawlessly takes time, patience, and repetition. As ProBaker points out, perfection in baguettes alone might require shaping a thousand loaves—an endeavor where learning from each attempt is vital.
Practical Tips for Home Bakers
ProBaker’s insights offer practical tips to ensure success in dough shaping:
- Keep Dough Covered: Always cover your shaped dough to prevent it from drying out during its final fermentation.
- Mind the Environment: The room’s temperature and humidity can affect your dough’s texture. Cooler conditions might require longer resting periods, whereas warmer settings might speed things up.
- Know Your Recipe: Different dough recipes have distinct hydration levels affecting how you should handle and shape them. Familiarizing yourself with these nuances is beneficial.
- Tools of the Trade: While hand-shaping is a skill in itself, certain tools like bench scrapers can aid in managing wet doughs without excess flour.
Embrace the Bread Journey
As we’ve explored, shaping is an art that requires attention, practice, and a willingness to learn from each loaf. Whether starting with beginner-friendly shapes or experimenting with advanced sourdoughs, each step is a building block to becoming a bread artist.
Remember ProBaker’s encouraging words: practice makes perfect. Whatever your current skill level, embrace each baking session as an opportunity to play, learn, and most importantly, enjoy the delicious results. Your bread—even if not picture-perfect—is a testament to your journey and dedication as a home baker.
In our next podcast episode, we’ll look at final fermentation—the last crucial stage that complements the shaping process and pushes us toward a beautifully crafted loaf. Keep your questions or suggestions coming, and be sure to explore all the videos in our Steps of Baking series. Happy baking!