Connect with us

Baking

Solving the Crumbly Bread Mystery: Common Causes and How to Fix Them

Sliced bread arranged in a neat row.

Picture this: You spent hours carefully following a bread recipe. You mixed, you kneaded, you patiently waited for the dough to rise. Your kitchen smells amazing as the loaf bakes to a beautiful golden brown. You pull it out, let it cool (mostly!), and reach for the knife, anticipating that perfect slice… only to have it crumble into a pile of dry pieces as you cut. Oh, the disappointment!

If this sounds familiar, you are definitely not alone. It’s one of the most common frustrations beginner bakers face. You followed the instructions, so why is my bread crumbly after baking? It’s easy to feel discouraged, but don’t hang up your apron just yet! Crumbly bread is usually a sign that something specific went slightly off track during the process, and the good news is, most of these issues are easily fixable once you know what to look for.

This guide is here to be your bread-baking detective. We’ll explore the most common culprits behind that disappointing crumbly texture and provide clear, actionable solutions to help you achieve the soft, sliceable, wonderful bread you’re aiming for. Let’s solve this mystery together!

What Exactly Do We Mean by “Crumbly” Bread?

First, let’s clarify what we’re talking about. When bakers refer to bread as “crumbly,” they usually mean:

Defining the Texture: Dry, Falls Apart Easily

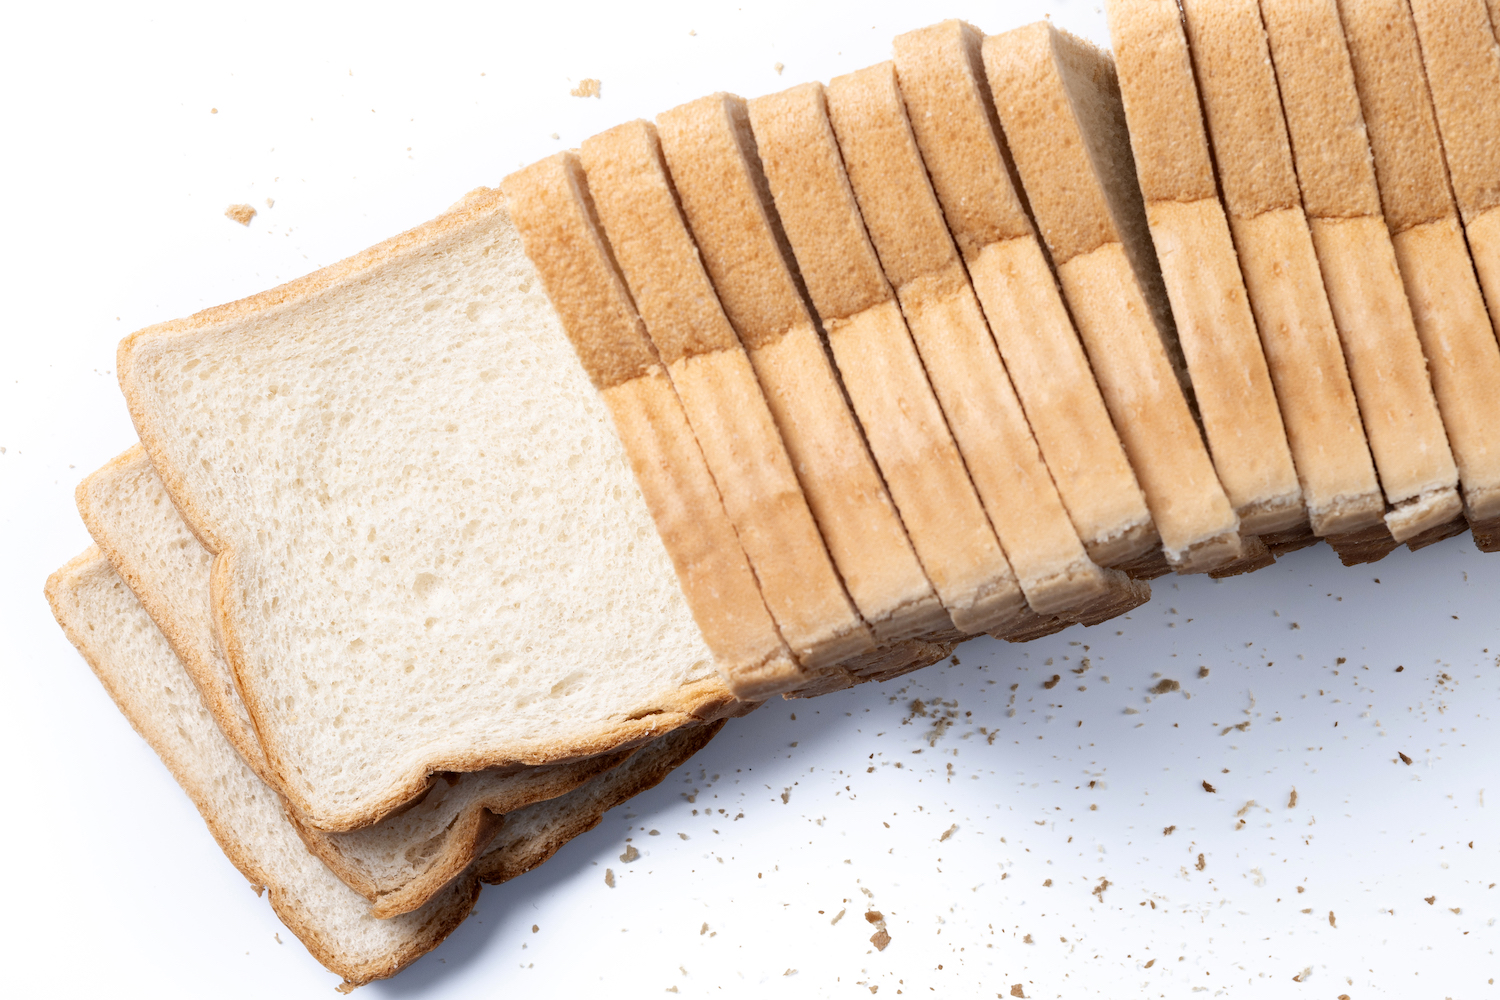
Instead of holding together nicely when sliced, the bread tends to break apart into small, dry crumbs. It might feel coarse or sandy in your mouth. Slicing it thinly is often impossible, and it might not hold up well for sandwiches or toast.

Good Crumb vs. Crumbly Crumb

A good bread crumb (the interior texture of the loaf) can range from light and airy with irregular holes (like ciabatta) to soft and tight (like sandwich bread) or chewy and substantial (like some sourdoughs). But regardless of the style, a good crumb holds together. It might produce some crumbs when cut, sure, but the slice itself remains intact. A crumbly crumb lacks that cohesion and structural integrity.

Why It’s a Problem

Besides being frustrating to slice and eat, crumbly bread is often quite dry. It doesn’t have that satisfying chew or moistness. It might be okay for croutons or breadcrumbs, but it’s certainly not the result you were hoping for!

So, let’s investigate the usual suspects behind this texture trouble.

Culprit #1: Measurement Mishaps – The Foundation Matters

Believe it or not, the most frequent cause of crumbly bread often happens right at the beginning: measuring your ingredients, especially the flour.

Too Much Flour: The Most Common Cause?

Adding even a little extra flour to your dough can throw off the hydration balance, resulting in a final loaf that is dense, dry, and – you guessed it – crumbly. Flour acts like a sponge, soaking up the liquid.1 Too much sponge, not enough liquid = dry bread.

Why Weighing Ingredients Beats Measuring Cups (Accuracy!)

Here’s a crucial tip for all baking: Invest in a digital kitchen scale. Measuring flour by volume (using cups) is notoriously inaccurate. How tightly you pack the flour into the cup, whether you scoop directly from the bag or spoon it in, can drastically change the amount of flour you actually add – sometimes by 20-30% or more! Baking is chemistry, and accuracy matters. Weighing your ingredients, especially flour and water, ensures you’re using the exact amounts called for in the recipe.

How Scooping Flour Incorrectly Adds Extra Flour

If you dip your measuring cup directly into the flour bag and scoop, you are compressing the flour and likely adding significantly more than the recipe intended.

The Fix: Invest in a Scale, Spoon & Level Method if Using Cups

  • Best Solution: Get a digital kitchen scale and use recipes that provide ingredients by weight (grams or ounces). It’s the single best investment you can make for consistent baking results. New to weighing? Check out our guide on Baking Basics: Measuring Ingredients Accurately (hypothetical internal link).
  • If Using Cups: Use the “spoon and level” method. Fluff up the flour in its container. Use a spoon to lightly scoop the flour into your measuring cup until it’s overflowing. Then, use the straight edge of a knife or spatula to level off the excess flour across the top of the cup. Do not shake or tap the cup to settle the flour.

Culprit #2: Flour Choices and Characteristics

The type and condition of your flour play a huge role in the final bread structure.

Low Protein Flour (e.g., Cake Flour vs. Bread Flour)

Flour contains proteins that form gluten when mixed with water and kneaded.2 Gluten creates the stretchy, elastic network that traps gas bubbles and gives bread its structure and chew.3 Different flours have different protein levels:

  • Bread Flour: High protein (usually 12-14%), develops strong gluten, ideal for chewy, structured breads.4
  • All-Purpose Flour: Moderate protein (usually 10-12%), can work for many breads but might result in a slightly less structured loaf.5
  • Cake/Pastry Flour: Low protein (usually 7-9%), forms weak gluten, perfect for tender cakes and pastries, but not suitable for most bread recipes. Using low-protein flour will result in a weak structure that can easily become crumbly.

Using Only Whole Wheat Flour

Whole wheat flour includes the bran and germ of the wheat kernel.6 While nutritious, these components (especially the sharp bran particles) can interfere with gluten development, essentially cutting the gluten strands and weakening the structure.7 Breads made with 100% whole wheat flour are often denser and can be more prone to crumbliness if not handled correctly (e.g., requiring more liquid or specific techniques).8

Flour Freshness and Storage

Flour doesn’t last forever. Old flour can lose moisture and its protein quality can degrade, potentially leading to poorer gluten development and a drier, crumblier loaf.9 Store your flour in an airtight container in a cool, dark place. In warm, humid climates like parts of Kenya, proper storage is especially important to prevent moisture absorption or degradation.

The Fix: Use the Right Flour, Combine Whole Wheat, Store Properly

  • Choose Appropriately: Use bread flour if the recipe calls for it, or at least a good quality all-purpose flour. Avoid cake or pastry flour for standard bread loaves.
  • Combine Flours: If using whole wheat, try substituting only a portion (e.g., 25-50%) of the white flour with whole wheat initially, until you get a feel for how it behaves.
  • Ensure Freshness: Use flour before its expiration date and store it correctly. Learn more about locally available options in our guide to Understanding Flour Types in Kenya (hypothetical internal link).

Culprit #3: Not Enough Fat or Enrichment

Ingredients like butter, oil, eggs, and sugar do more than just add flavour.

The Role of Fat (Butter, Oil) in Tenderizing Crumb

Fats coat flour proteins, slightly inhibiting gluten development.10 This might sound bad, but in moderation, it actually tenderizes the crumb, making it softer and less prone to dryness and crumbling. Fat also adds moisture and richness.11

Eggs and Sugar: How Enrichment Adds Moisture and Softness

Eggs add fat, moisture, and structure (from the proteins).12 Sugar not only adds sweetness but is also hygroscopic, meaning it attracts and holds onto moisture, contributing to a softer, less crumbly texture.13 Milk (instead of water) also adds fat, sugar (lactose), and protein, contributing to softness.14

Lean Doughs vs. Enriched Doughs

  • Lean Doughs: Made with just the basics: flour, water, salt, yeast/starter (e.g., baguettes, basic sourdough).15 These rely heavily on proper gluten development and hydration for texture. If made incorrectly (especially with too much flour), they can become dry and crumbly.
  • Enriched Doughs: Contain added fats, sugar, eggs, or dairy (e.g., brioche, challah, soft sandwich loaves).16 These additions naturally create a softer, more tender crumb that is generally less prone to crumbling.

The Fix: Follow Recipes Accurately, Consider Enrichment

  • Don’t Skimp: If your recipe calls for butter, oil, eggs, or milk, use the specified amounts. Reducing these can negatively impact the texture.
  • Choose Enriched Recipes: If you consistently struggle with crumbly lean breads, try baking some enriched recipes to enjoy a naturally softer crumb while you continue practicing your technique on lean doughs.

Culprit #4: Under-Kneading – Weak Gluten Structure

Kneading isn’t just about mixing ingredients; it’s about developing that crucial gluten network.

What Kneading Does: Developing the Gluten Network

The physical action of kneading stretches and aligns the gluten proteins, creating a strong, elastic web throughout the dough.17 This web traps the gases produced by the yeast, allowing the bread to rise, and provides the structure needed to hold the loaf together after baking.

Signs of Under-Kneaded Dough

Dough that hasn’t been kneaded enough will often look shaggy, tear easily when stretched, and won’t feel smooth or elastic.

How Weak Gluten Leads to Crumbliness

If the gluten network is underdeveloped and weak, it can’t effectively trap steam or support the structure of the loaf as it bakes and cools. The resulting bread lacks cohesion and falls apart easily – hence, crumbliness.

The Fix: Knead Until Smooth and Elastic (Windowpane Test)

  • Knead Thoroughly: Whether by hand or machine, ensure you knead the dough long enough. It should transform from a sticky mess into a smooth, pliable, elastic ball.
  • Learn the Windowpane Test: This is the best way to check if gluten is sufficiently developed. Take a small piece of dough and gently stretch it between your fingers. If you can stretch it thin enough to see light through it without tearing (like a windowpane), the gluten is well-developed. If it tears easily, keep kneading. Need a visual? Check out this helpful guide and video on kneading techniques from King Arthur Baking (external link).

Culprit #5: Proofing Problems – Timing is Everything

Letting your dough rise (proofing) is crucial, but getting the timing wrong can affect the final texture.

Under-Proofing

If you don’t let your dough rise long enough, not enough gas will be produced, resulting in a dense, heavy loaf. While denseness isn’t exactly the same as crumbliness, the poor texture can sometimes contribute to it feeling less pleasant and potentially falling apart more easily than a well-risen loaf.

Over-Proofing: The Bigger Danger for Crumbliness

This is often a more likely culprit for crumbly texture related to proofing. If the dough proofs for too long, the yeast produces excessive gas, and the gluten network becomes over-stretched and weak, like an old balloon.18 The structure can’t support itself, may collapse during baking, and the resulting bread often has a coarse, open, and very crumbly texture.

The Fix: Learn the Poke Test for Perfect Proofing

  • Don’t Rely Only on Time: Recipe proofing times are just estimates. Factors like room temperature and yeast activity affect the actual time needed.
  • Master the Poke Test: Gently press your fingertip into the side of the proofing dough.
    • Springs back immediately: Under-proofed. Needs more time.
    • Springs back slowly, leaving a slight indent: Perfectly proofed. Ready to bake!
    • Indent stays completely: Over-proofed. Bake immediately, expect potential issues.
  • Need a refresher on proofing? Our Cold Oven Proofing Guide (hypothetical internal link) also covers the poke test.

Culprit #6: Baking Blunders – Too Hot or Too Long

How you bake the bread is just as important as how you prepare the dough.

Over-Baking: Drying Out the Crumb

This is a straightforward cause of dry, crumbly bread. Baking the loaf for too long simply evaporates too much moisture from the crumb.19

Oven Temperature Too High

If your oven runs hotter than the dial indicates, the crust can form and brown too quickly before the inside is fully baked. You might end up baking it longer to cook the inside, resulting in a dried-out interior. Or, the intense heat itself can contribute to a drier crumb structure.

Importance of Internal Temperature (Using a Thermometer)

The most reliable way to know if your bread is perfectly baked is to use an instant-read digital thermometer. Colour and tapping the bottom can be subjective. Checking the internal temperature removes the guesswork.

The Fix: Use an Oven Thermometer, Bake Until Correct Internal Temp, Tent with Foil

  • Verify Oven Temp: Use an inexpensive oven thermometer to check if your oven temperature is accurate. Adjust the dial accordingly if needed.
  • Bake to Temperature: Most standard loaves are done when the internal temperature reaches 90-99°C (195-210°F). Enriched doughs are usually at the higher end of this range. Consult a reliable source like the Thermoworks Blog (external link) for target temperatures for different bread types.
  • Tent If Needed: If the crust is browning too quickly but the internal temperature isn’t reached yet, loosely tent the loaf with aluminum foil for the remainder of the baking time.

Culprit #7: Cooling Catastrophes – Patience Pays Off!

You’ve done everything right so far, but one final misstep can still affect your texture.

Why Slicing Hot Bread is a Bad Idea

It’s incredibly tempting to slice into that warm loaf straight from the oven, but resist! When bread is hot, the internal structure is still delicate, and there’s a lot of steam trapped inside. Slicing it releases this steam (which is moisture!) and can compress the delicate crumb, leading to a gummy texture initially. Once it cools after being cut hot, it can actually seem drier and more crumbly because it lost moisture and the structure was compromised.

The Science of Cooling: Structure Setting, Moisture Redistributing

As bread cools on a wire rack (which allows air circulation all around), several important things happen:

  • The starches finish setting (a process called retrogradation), firming up the structure.
  • The internal moisture redistributes evenly throughout the crumb.

How Long to Cool?

Let your bread cool completely on a wire rack before slicing. This usually takes at least 1-2 hours for standard loaves, and sometimes longer for larger or denser breads.

The Fix: Let Bread Cool FULLY Before Slicing

  • Be Patient: Place your baked loaf on a wire rack and walk away! Find something else to do for a couple of hours. Your patience will be rewarded with better texture and flavour.

Putting it All Together: Your Troubleshooting Checklist

Feeling overwhelmed by the possibilities? Don’t be! Next time you bake, if your bread turns out crumbly, work through this checklist:

  1. Measurements: Did I weigh my flour, or carefully spoon and level if using cups? Could I have accidentally added too much flour?
  2. Flour: Was I using the right type of flour (bread or AP, not cake)? Was it fresh? If using whole wheat, was it balanced with white flour?
  3. Enrichment: Did the recipe call for fat/eggs/sugar? Did I include the correct amounts?
  4. Kneading: Did I knead the dough until it was smooth, elastic, and passed the windowpane test?
  5. Proofing: Did I check the proof using the poke test? Could it have been over-proofed?
  6. Baking: Did I bake it too long or at too high a temperature? Did I check the internal temperature?
  7. Cooling: Did I let it cool completely on a wire rack before slicing?

Often, the answer to “why is my bread crumbly after baking?” lies in one or two of these key areas.

Conclusion: The Path to Perfect Slices

Discovering your homemade bread is crumbly can be disheartening, especially when you’re starting out. But as we’ve seen, the reasons are usually straightforward and entirely fixable. More often than not, paying close attention to accurate measurements (especially flour!), ensuring proper gluten development through sufficient kneading, proofing correctly, and baking accurately (using internal temperature!) will solve the problem. And never underestimate the power of letting your bread cool completely!

Don’t let a few crumbly loaves deter you. Every bake is a learning experience. By understanding these common causes, you’re already well on your way to diagnosing and fixing the issue. Keep practicing, pay attention to the details, and soon you’ll be consistently slicing into beautiful, moist, structurally sound loaves that are as delightful to eat as they are to bake.

Happy Baking!


Meta Description:

Is your homemade bread crumbly? Find out why! Our guide explains common causes (measuring, flour, kneading, baking) & simple fixes for beginner bakers.

Keywords:

  • Primary: why is my bread crumbly after baking
  • Secondary: crumbly bread causes, fix crumbly bread, dry bread crumb, bread texture problems, beginner bread troubleshooting, baking dense bread, too much flour bread, improve bread texture
Continue Reading
East Africa Chef We would like to show you notifications for the latest updates.
Dismiss
Allow Notifications